In this blog we will target the SOLR service for Sitecore 10, and hence we will configure SOLR 8.4.0. If you are looking for a solution for older version of Sitecore or SOLR then you can refer Dan Cruickshank’s blog here.
Setting up the App Service
Login to Azure portal. Navigate to App Services and choose to Add.

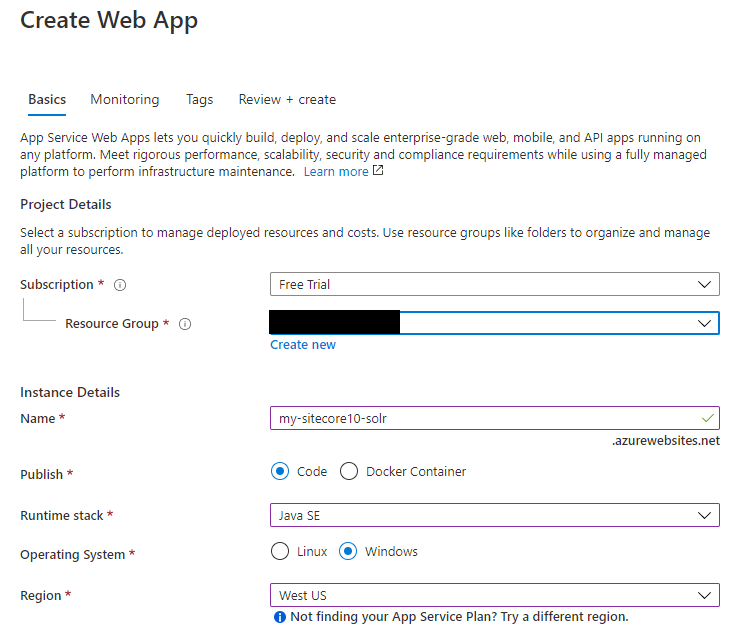
On the next screen, we need to provide the required details-
Select the Subscription, Resource group – One can create a new Resource group if it is required or select existing one.
Provide Instance Name. Choose Publish as Code, Runtime stack as Java 8, Java SE from the list.
Choose operating system as Windows.
Select the Region – where you want to create App Service.
Select the Windows Plan.
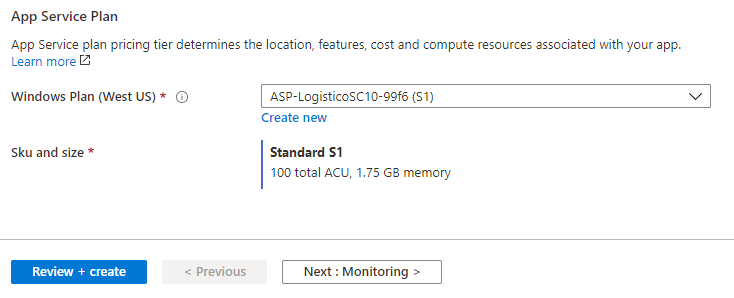
Now click on Next: Monitoring.

Click on Next : Tags to associate Tags to this App Service. It is you choice to add Tags at this step since it is not mandatory to add Tags.

Click on Next : Review + create button.
In this step, review the configuration and create the App Service.
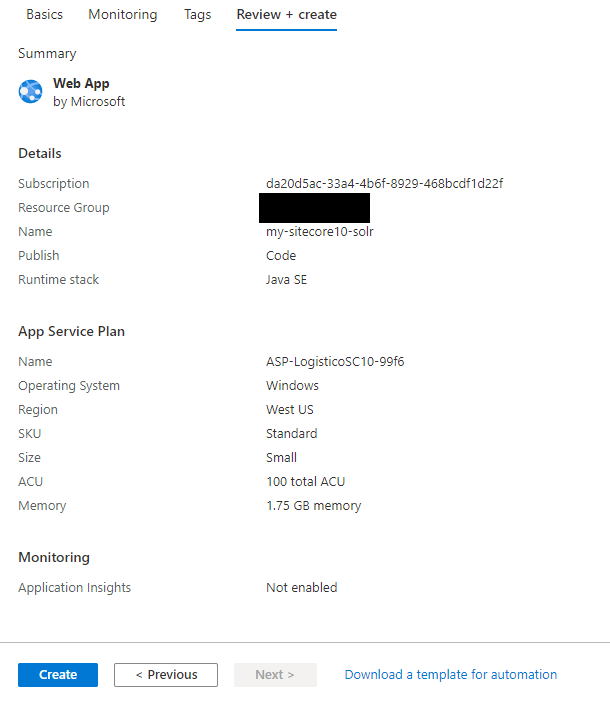
Once the configurations are validated, click on Create to create the App Service.
This will start the deployment and will create App Service for you.
Now, we need to download Solr 8.4.0 from https://archive.apache.org/dist/lucene/solr/
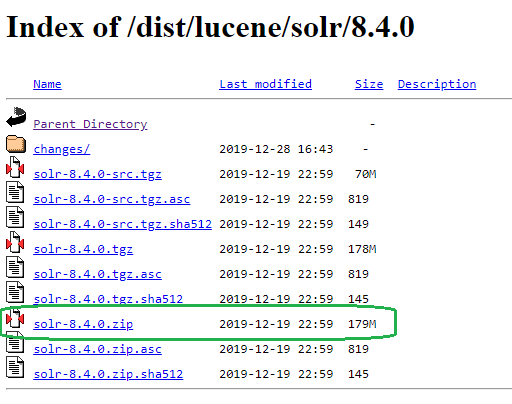
After downloading, extract the zip folder to a directory for ex. C:\solr840
Now we need to add a web.config file to this location which will have following code.
<?xml version="1.0" encoding="UTF-8"?>
<configuration>
 <system.webServer>
   <handlers>
     <add  name="httpPlatformHandler"
           path="*"
           verb="*"
           modules="httpPlatformHandler"
           resourceType="Unspecified" />
   </handlers>
   <httpPlatform processPath="%HOME%\site\wwwroot\bin\solr.cmd"
       arguments="start -p %HTTP_PLATFORM_PORT%"
       startupTimeLimit="20"
       startupRetryCount="10"
       stdoutLogEnabled="true">
   </httpPlatform>
 </system.webServer>
</configuration>
So, your Solr folder will look like below

Configuration changes for Sitecore
As we need to use this in Sitecore, so we will need to make a change as follows-
Open managed-schema file located in \Server\Solr\configsets\_default\conf folder.
Set the value in the <uniqueKey>id</uniqueKey> node to _uniqueid.
e.g. <uniqueKey>_uniqueid</uniqueKey>
In the fields section, add field configuration for _uniqueid if it is not found:
<field name="_uniqueid" type="string" indexed="true" required="true" stored="true"/>
Deploy local SOLR instance to Azure
Now, we are ready to deploy the SOLR instance to our App Service with help of FTP.
In Azure Portal, navigate to App Service details and then navigate to Deployment Center.

From Deployment Center, click on FTP and click on Dashboard.

A window will be shown with FTP details – like below snap.

With these details, we can connect to this FTP location and push the content from our Solr folder (c:\solr840) to the App Service.
You can use FileZilla to transfer your files over FTP.

Once all files and directories are copied, restart the App Service.
After restart, try accessing the App Service URL

You will see the Solr Dashboard.

Now, you can use this Solr in your Sitecore instances for indexing.
Thank you.. Keep Learning.. Keep Sitecoring.. 🙂

Pingback: How to create SOLR cores on Azure hosted SOLR service? | Sitecore Diaries
Pingback: Installing Sitecore 10 using SOLR as Search Provider on Azure | Sitecore Diaries
Reblogged this on معتز خالد سعد | Motaz Saad and commented:
deploy Solr on Azure as a web app
LikeLike
Hello,
Thanks very much for this post.
May I please suggest an addition to this article to not turn on Azure Application Insights. When this is turned on, SOLR refuses to start and will save people a lot of heartache in the future.
Regards,
Sean
LikeLike
Pingback: Install Solr as an Azure App Service for Sitecore 10 | Programming Silkness
Good one Sean!
LikeLike