In this blog, we will build the Banner component end to end i.e. from creating template, creating Media items, content and renderings. So when the individual developers take an responsibility of the components, they create it in similar fashion.
The Main Banner on the Home page is like:

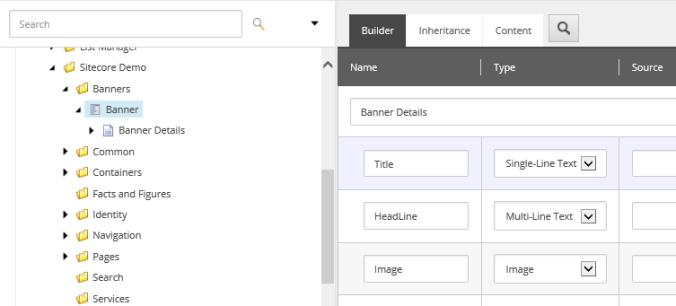
So how we can see it as is:
Image
Title
HeadLine
CTA Text – To be inherited from CTA template
CTA Link – To be inherited from CTA template
- Go to the Sitecore (http://sitecoredemo.dev.local/sitecore)
- Go to Content Editor >> Template >> Sitecore Demo >> Banners.
- Right click on Banners template folder >> Insert >> New template and name it Banner.
- Add the fields – Title, HeadLine and Image
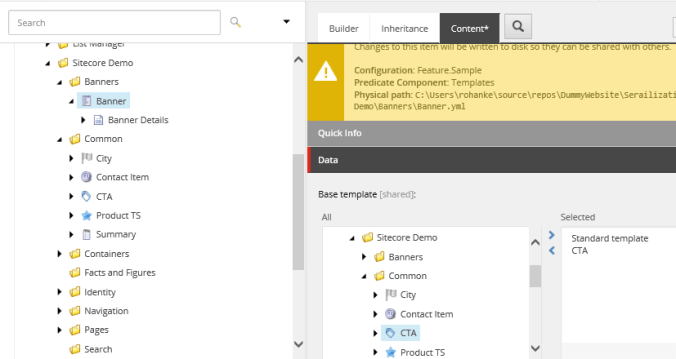
- Lets inherit the CTA template under Common in this template. Click on Content tab and double click on CTA template.
- Save the changes and configure the icon for the template.

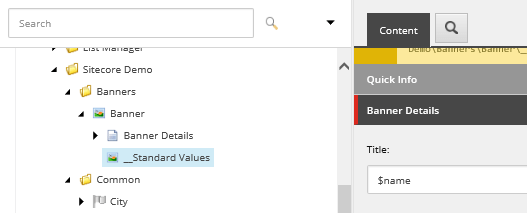
- Click on the Builder Options tab and Standard Values.
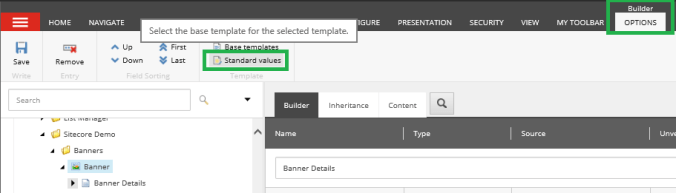
- Enter $name in Title field as a default value.
- In the Containers template folder we will create one Container folder for Banner and name it “Banners Folder”. And set an icon to the template.
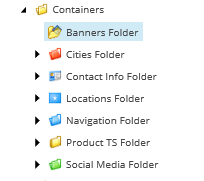
- Click on the Builder Options tab >> Standard values. Go the Insert options section. In case if you cant see any sections then go to View tab and click on Standard fields check box.

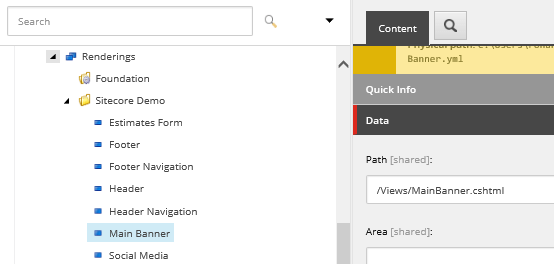
- Now we can create a content in Content under Global folder.
- Add the Banners folder under Global.
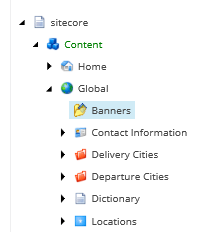
- Right Click on Banners >> Insert >> Banner and Name it as “Main Banner”.
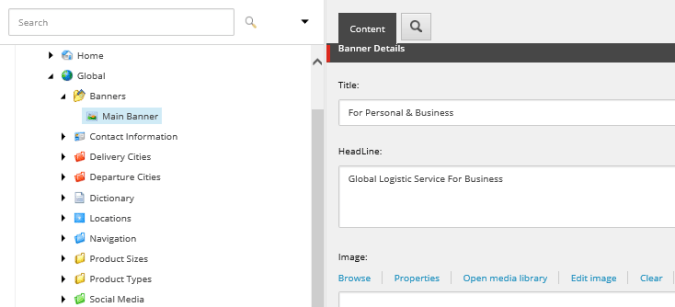
- Lets save the background image and upload it in the Media Library.

- Go back to Main Banner item and insert the image there. Also add the CTA text as “Our Services”. Link we will add once the Service Listing page is ready.

- We are ready with the Sitecore Content now. Lets move to Visual studio solution.
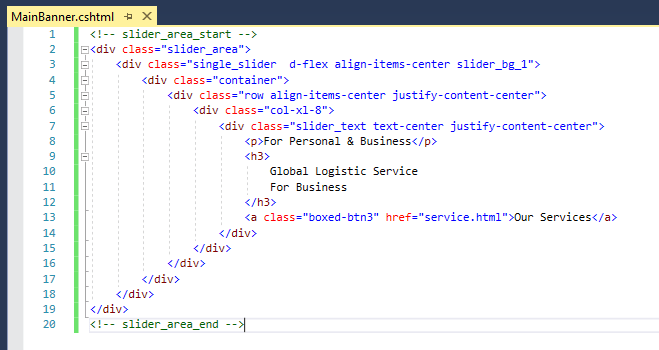
- Create a new view MainBanner.cshtml and copy the HTML markup for the Banner from index.html under the Logistico template folder.
- First lets create a rendering in Sitecore, assign it to Home item and see if it is rendering on front end then we will fetch the content from Sitecore.
- Go to /sitecore/layout/Renderings/Sitecore Demo and create a View Rendering & name it “Main Banner”.
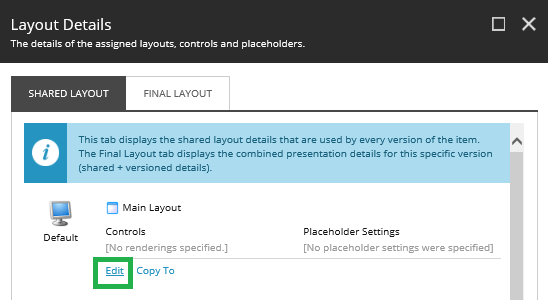
- Lets assign it to the Home item (/sitecore/content/Home). Click on Presentation tab >> Details.
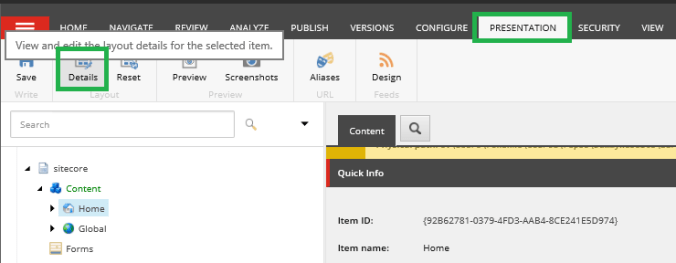
- Click on the Edit click.
- Click on Controls >> Add.
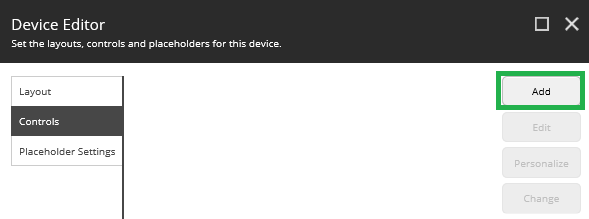
- Expand Rendering and select the Main Banner rendering.
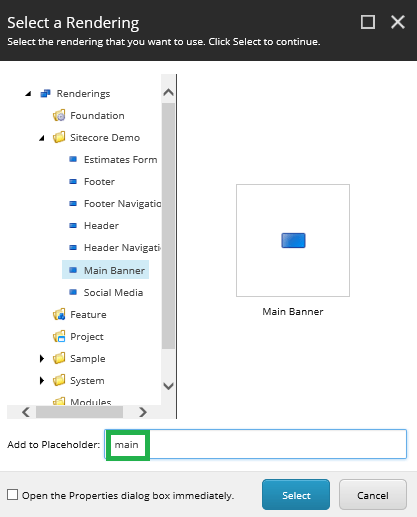
- Add the placeholder key (“main”) in the Add to Placeholder textbox as highlighted in Green in above screenshot. The key “main” is used as we used it for dynamic binding in the Main.cshtml. So this rendering will replace that placeholder in the Main.cshtml file.
- Click on Select. >> OK >> OK.
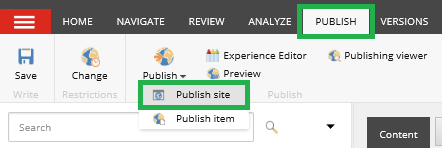
- Publish the site.
- Once the publish is completed. Publish MainBanner.cshtml from Visual Studio and load the front end (http://sitecoredemo.dev.local/)

- So now we have to fetch the content from Sitecore.
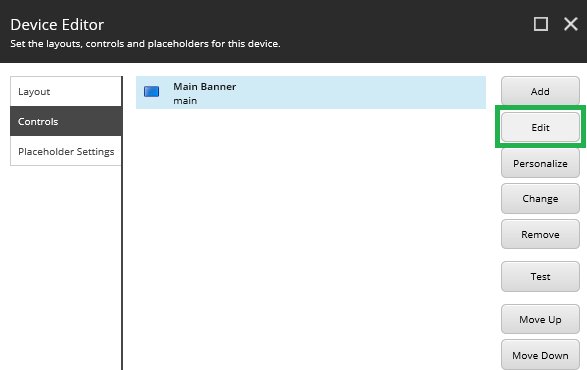
- Go to Home item >> Presentation tab >> Details >> Edit >> Controls.
- Select the Main Banner rendering and click Edit.
- In the Data source field, click Browse and select the Main Banner item under Global.

- Click OK >> OK >> OK.
- Publish the Home item.
- Move to Visual Studio solution.
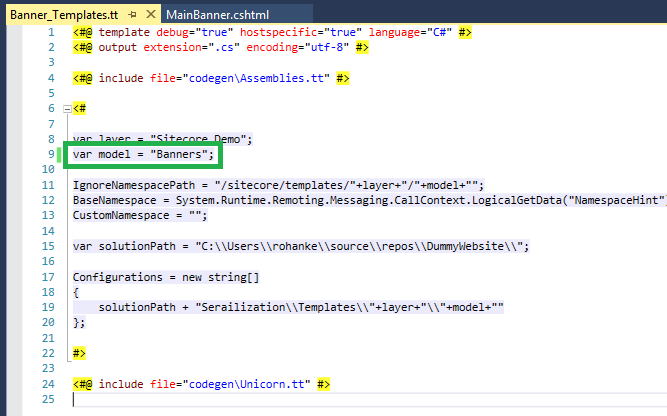
- Copy & paste Common_Templates.tt file and rename it to Banner_Templates.tt file. Change the value of models to “Banners”.
- Open the MainBanner.cshtml file and add the below namespaces and code to fetch the data source item.
@using Sitecore
@using Sitecore.Mvc
@using Sitecore.Mvc.Presentation
@using Sitecore.Data
@using Sitecore.Data.Items
@using DummyWebsite@{
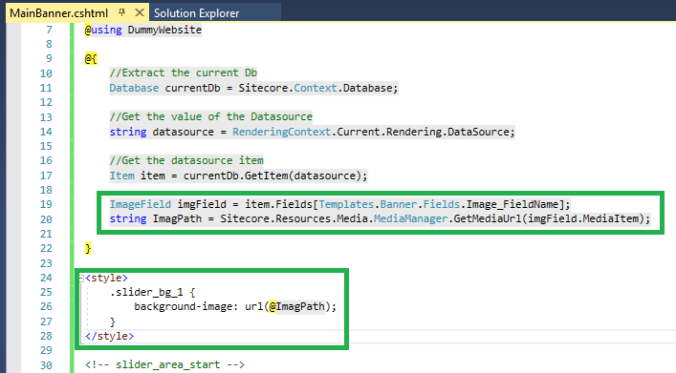
//Extract the current Db
Database currentDb = Sitecore.Context.Database;//Get the value of the Datasource
string datasource = RenderingContext.Current.Rendering.DataSource;//Get the datasource item
Item item = currentDb.GetItem(datasource);
}
- Lets replace the hard coded values by the Sitecore Content.
The title can be replaced by : @Html.Sitecore().Field(Templates.Banner.Fields.Title_FieldName, item)
The Headline can be replaced by : @Html.Sitecore().Field(Templates.Banner.Fields.Title_FieldName, item)
The CTA Text can be replaced by : @Html.Sitecore().Field(Templates.Banner.Fields.Title_FieldName, item)
The CTA Link can be replaced by : @Html.Sitecore().Field(Templates.Banner.Fields.Title_FieldName, item) - Replace the HTML markup by
<!– slider_area_start –>
<div class=”slider_area”>
<div class=”single_slider d-flex align-items-center slider_bg_1″>
<div class=”container”>
<div class=”row align-items-center justify-content-center”>
<div class=”col-xl-8″>
<div class=”slider_text text-center justify-content-center”>
<p>@Html.Sitecore().Field(Templates.Banner.Fields.Title_FieldName, item)</p>
<h3>
@Html.Sitecore().Field(Templates.Banner.Fields.HeadLine_FieldName, item)
</h3>
@Html.Sitecore().Field(Common_Templates.CTA.Fields.Link_FieldName, item,
new
{
@class = “boxed-btn3”,
text = @Html.Sitecore().Field(Common_Templates.CTA.Fields.Text_FieldName, item)
})
</div>
</div>
</div>
</div>
</div>
</div>
<!– slider_area_end –>

- Publish Visual Studio solution and load the front end.
- We are almost done with the component. If you check the background image is not loading and at the same time there is no img tag in HTML markup to enter it.
- So the background img is coming through CSS.
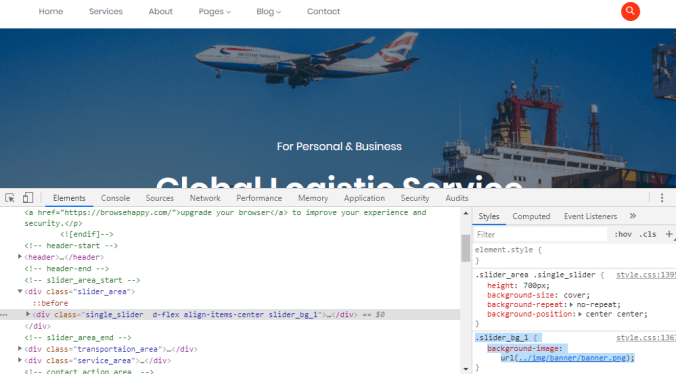
- So we need to fetch the URL of the image from Sitecore and provide it to a class in MainBanner.cshtml. Code to fetch the image URL:
ImageField imgField = item.Fields[Templates.Banner.Fields.Image_FieldName];
string ImagPath = Sitecore.Resources.Media.MediaManager.GetMediaUrl(imgField.MediaItem);
And we need to add the CSS class:
<style>
.slider_bg_1 {
background-image: url(@ImagPath);
}
</style>
- Publish the MainBanner.cshtml and reload the Front end site.

This completes our development of Banner component. Hope this detailed blog will help you develop such models. Please get in touch with me if there are any issues while following the above steps.
To summarize, we create a template with the required fields, created the content out of it, created a view rendering and assigned the rendering to the Home item and passed the content as a data source to it.
In the next blog, we will create the Featured Services component.
Thank you.. Keep Learning.. Keep Sitecoring.. 🙂

Pingback: Creating a Layout – Part IV | Sitecore Dairies
Hello, i read your blog from time to time and i own a similar one and i was just wondering if you get a lot of spam responses? If so how do you prevent it, any plugin or anything you can suggest? I get so much lately it’s driving me insane so any support is very much appreciated.
LikeLiked by 1 person
I would recommend you to use Google re-captcha V3. It is really helpful as well as it allows your users to have friction less interaction with your site.
LikeLiked by 1 person