Lets understand why we use Solr and then we can start setting it up. So Solr is a search engine which will have all the data you create in Sitecore. It is a java based application and hence the prerequisites is installing Java and setting up environmental variable for the same.
- Installing Java:
Download Java and install by running the .exe file. - Setting up environmental Variable:
a. Once the Java is installed, you should find it under this path (C:\Program Files\Java). In my case it is (jdk1.8.0_221)
b. Now we need to add this path as environmental variable.
c. Go to Control Panel
d. Go to User Accounts
e. Click on “Change my environment variables”

f. Click on New

g. Enter “JAVA_HOME” in Variable name and “C:\Program Files\Java\<Java version>” in variable value. In my case java version is jdk1.8.0_221 so the value will be “C:\Program Files\Java\jdk1.8.0_221”. - Download the Solr zip file from Apache site

- Create a folder in D drive (“D:\Solr5.2.1”) and extract the downloaded zip file here.

- We can try running it and check if are able to access Solr Dashboard
- Run cmd in administrator mode and navigate to solr’s folder using the command “cd D:\Solr5.2.1\solr-5.2.1”

- Once you have navigated to Solr folder, hit the command to run Solr on port 8983 – “bin\solr start -p 8983”
- Now you can open browser and hit URL to check the Solr dashboard – “http://localhost:8983/solr”
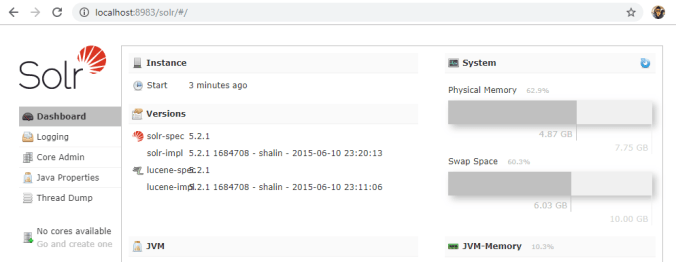
- Once you have accessed this dashboard, it means Solr is working fine and now we need to create a windows service for the same so we don’t need to run it using command prompt.
- To create windows Service for Solr, we use NSSM. So lets download NSSM.
- Move the zip file from Downloads to the Solr folder under D drive and extract it.
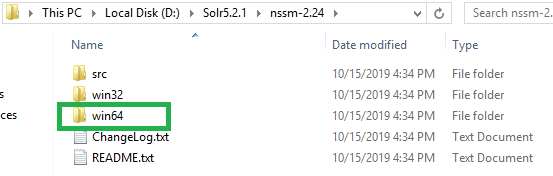
- Go to win64 folder and note the path of the folder i.e. “D:\Solr5.2.1\nssm-2.24\win64”
- Open the cmd in administrator mode and navigate to this path.
- Hit the command “nssm install solr5”

- Enter Path as “D:\Solr5.2.1\solr-5.2.1\bin\solr.cmd”, Startup directory as “D:\Solr5.2.1\solr-5.2.1\bin” and Arguments as “start -f -p 8983”.
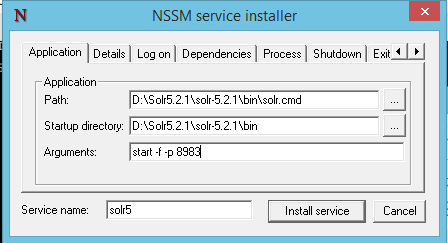
- Click on Install service.
- Once the service is installed successfully, browse the solr dashboard once again by accessing URL – http://localhost:8983/solr
And we are done with all the prerequisites for Sitecore installation. In the next blog we will install Sitecore 8.2 latest update. Hopefully by now you have received the Sitecore license.
Thank you.. Happy Learning.. Happy Sitecoring.. 🙂

Pingback: Installing the required Software | Sitecore Dairies