May be we are late to start using Sitecore on Azure PaaS but it is okay. Better be late then never. So lets start our journey of Sitecore on Azure PaaS.
So to begin with we will need to create a Azure account to access Azure Portal. Just follow the steps in this blog to create a free Azure account.
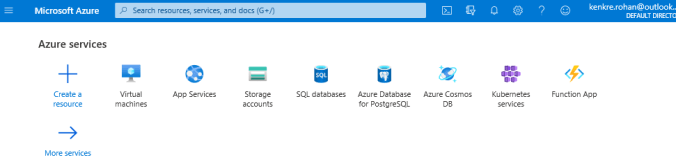
Once you have created an Azure account. We can start our steps to install Sitecore.
- Go to the Azure Portal dashboard.
- In the Search bar next to logo, search for Sitecore.
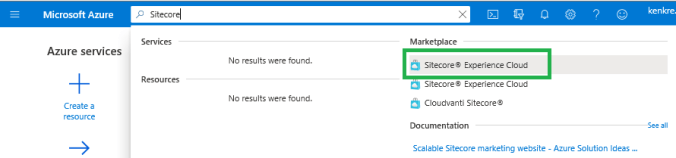
- Click on Sitecore Experience Cloud.
- The marketplace Sitecore Experience Cloud will be loaded, this nothing but a tool that will install Sitecore for you.

- Give name to the Resource Group. Since we have created a new Azure account, we dont have any resource groups. in case you already have one then you can select the existing one as well.
- Lets name the Resource Group as ‘sitecoredemo’

- Once you name the resource group, the Sitecore Settings will be enabled.
- Click on Sitecore Settings.

- There are some known issues with this Marketplace approach which are listed on the top of the page. Another way to install Sitecore on Azure PaaS is using ARM templates but will see the Sitecore Marketplace approach in this blog.
- Select the Version and it’s related data. I will select Sitecore 9.3, Topology: XP, Configuration: Scaled Development and Size: Extra Small

- Click Next.
- On the Credentials tab, we will enter the password for Sitecore admin user, the SQL user and password which we want to be created on Azure, Upload License, Certificate details, etc.

- For Search, you have 2 options, you can use Azure Search which will be configured during the installation or SOLR search for which you will need to configure it before this installation and specify the URL here.
Note: Do not configure SOLR on local machine and specify local path here. - We will select Azure Search, 1 replica.

- Click Next.
- In the region, you can select the different regions for your application and application insights. We will select East US for both as of now.

- Click Next.
- In the Summary tab, review all the details and Click OK.
- Click on Legal Terms.

- Go through all the terms mentioned on the page and Click Create at the lower left corner.
- Click OK.

- The process to deploy Sitecore on Azure PaaS will start. Generally this process takes 15-20 mins.
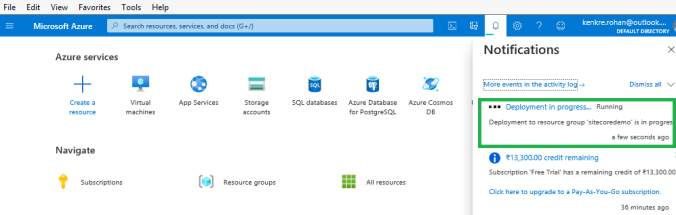
Sometimes this deployment fails immediately, no need to worry, you will need to repeat the above steps. Only in the 5 step, you will select the existing resource group.
Once the deployment is successful. You will see the same notification with Go to Resource Group buttons.

Steps to access your Sitecore site:
- Click on Go to resource group button.

- Click on the App service sitecoredemo-xxxxx-cd highlighted in the above image
- Copy the URL and open in new tab.

- The Sitecore CD site will load.

- In case you want to access sitecore, access using CM app service through resource group.
In the next blog we will check how to connect to the app service of Sitecore application on Azure PaaS to publish our Visual Studio solution.
Thank you.. Keep Learning.. Keep Sitecoring.. 🙂

Pingback: Publishing the VS solution to Sitecore Azure PaaS instance | Sitecore Diaries
Pingback: Installing Sitecore 10 using SOLR as Search Provider on Azure | Sitecore Diaries