Welcome back! Till now we have created templates and content based on those templates. Its a time we start creating a layout.
So Layout in Sitecore is similar to a Master page concept in web forms which we will be using on all the pages. So as we know about Static and Dynamic renderings. We will be binding components like Header, Social Media, Get Estimates form & Footer statically on the Layout where as the other components which vary on all the pages will remain Dynamic. If you are not sure about Static and Dynamic renderings then you can read it here.
So lets start creating a layout for the logistico website.
- Go to the folder where you have extracted Logistico.zip.
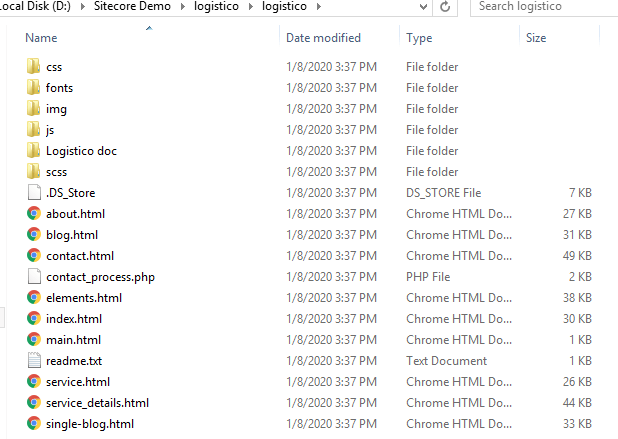
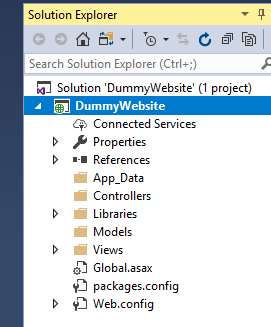
- Open the Visual studio in administrator mode. And open the DummyWebsite solution.
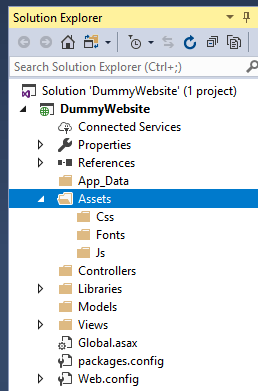
- Create a folder Assets under the solution.

- Create Css, Fonts and Js folder under this folder.
- Click on Css folder >> Right Click >> Add >> Existing Item.
- Browse to the extracted folder and go to css folder and add all the files.

- Similary, add font files under Fonts folder & Js files under Js folder.

- So now we have the assets of the HTMl template in our website scope.
- Lets open a Web.config file under Views (/Views/Web.config) and add a namespace to it.
<add namespace=”DummyWebsite” />
<add namespace=”Sitecore.Mvc” />

- Click on Views folder and add a View, name it “Main”.
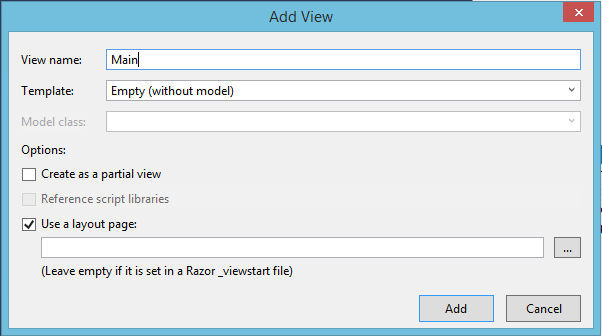
- Click Add. A scaffolding process will start which will add couple of files and folders which we need to delete.
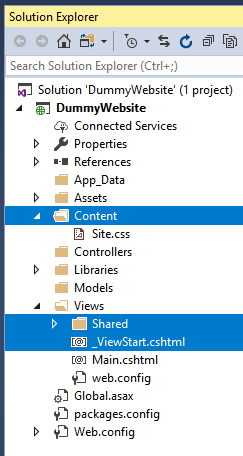
- Delete the highlighted files and folders.

- Open the index.html file under the extracted Logistico folder in notepad++ and copy all the content to the Main.cshtml.

- Lets change the references one by one to the one in the Visual Studio.
Changed for Css references:

Changed for Scripts:

- Lets publish the codebase to website folder.
- Click on Dummy Website and click on Publish.

- Click on Publish button. Once the publish is successful, load the sitecore site & go to Content Editor.
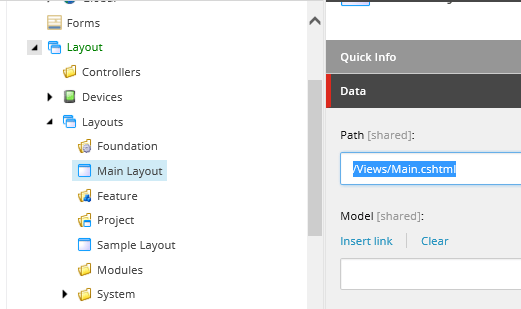
- Go the Layouts (/sitecore/layout/Layouts)

- Right Click >> Insert >> Layout. And name it as Main Layout.

- Click Next >> Next >> Create.
- Change the value of Path field to : “/Views/Main.cshtml” as we have created the View at this location.
- Go to Home node (/sitecore/content/Home).
- Click on Presentation tab >> Details.

- Click on the Edit link for Default device.
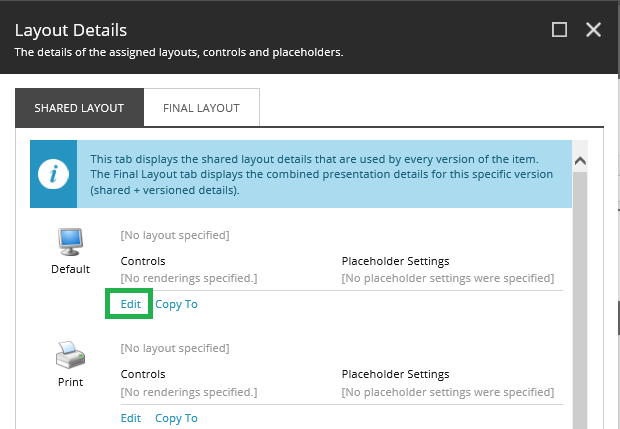
- In the drop down select the Main layout and Click OK.

- Again click OK.
- Go to Publish tab and publish site to the web database.
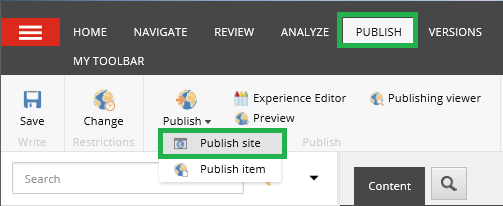
- Click Publish and wait for the completion of the publishing process.

- Once the publish is completed. Browse the front end site (http://sitecoredemo.dev.local/)

- The html is properly published and configured. The only thing you will notice is the images will not appear as we have not added the Images folder in the assets.
- Lets remove the html which will be dynamically bound to the layout later like Services, Testimonials, etc.
- Go to the Main.cshtml file in Visual Studio.
- Locate the Comments “header-end”
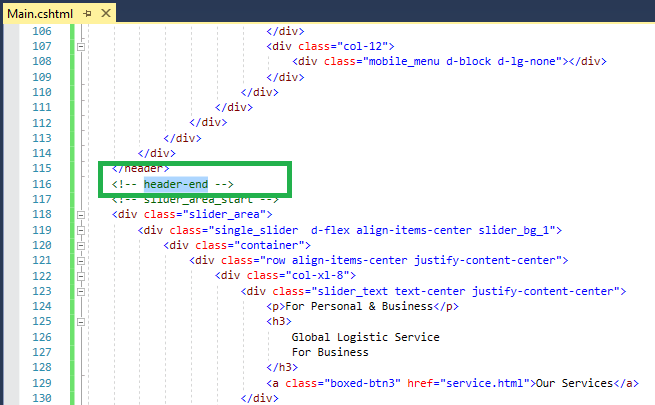
- Locate the Comments “Estimate_area start”

- Remove all the HTML between these comments.

- Save and Publish the Main.cshtml.

- Reload the Front end site.

So we have created a layout with the static HTML, in our next blog we will divide the HTML in different components and binding it statically and will also create a placeholder to bind the other components dynamically.
Thank you.. Keep Learning.. Keep Sitecoring.. 🙂

Pingback: Setting up Dictionary Items (Resource Strings) | Sitecore Dairies
Very well said.
LikeLiked by 1 person