So now as we have both sites – Sitecore(CM) and front end(CD), we can edit it’s content using both Content Editing Interfaces.
- Content Editing using Experience Editor.
Experience Editor is for non technical Content Editors and it is what you see is what you get(WYSWYG) interface. So lets edit the content and see if we have configured the site correctly.
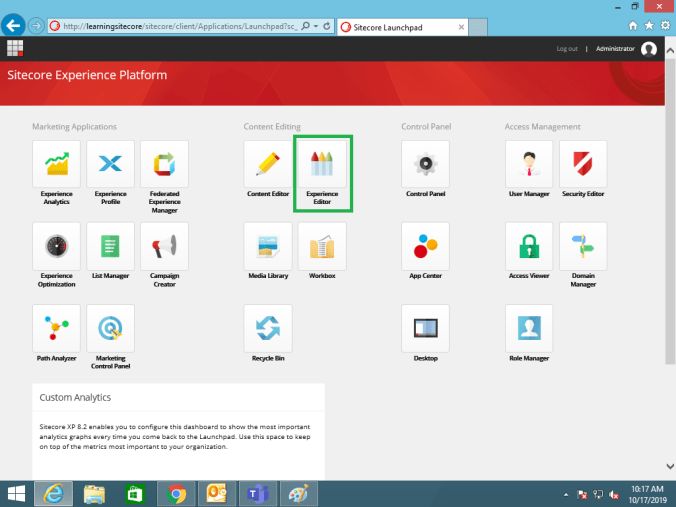
a. Go to Sitecore Dashboard and Login with credentials (admin/b)

b. Click on Experience Editor
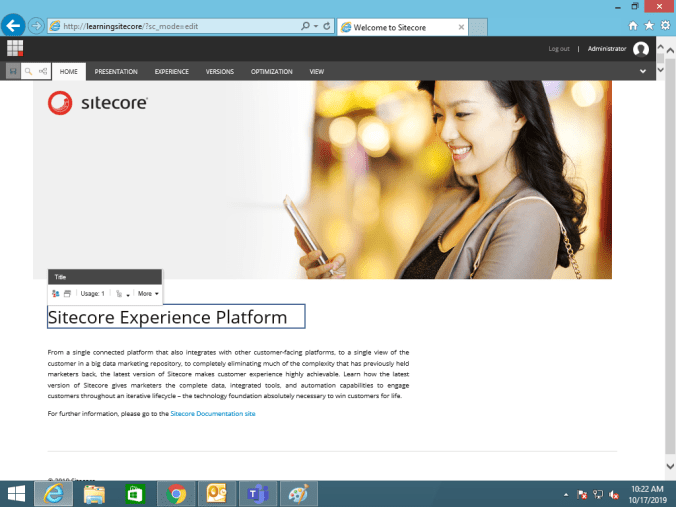
c. Now you will see that the editor looks similar to front end site and it is in the editable mode.
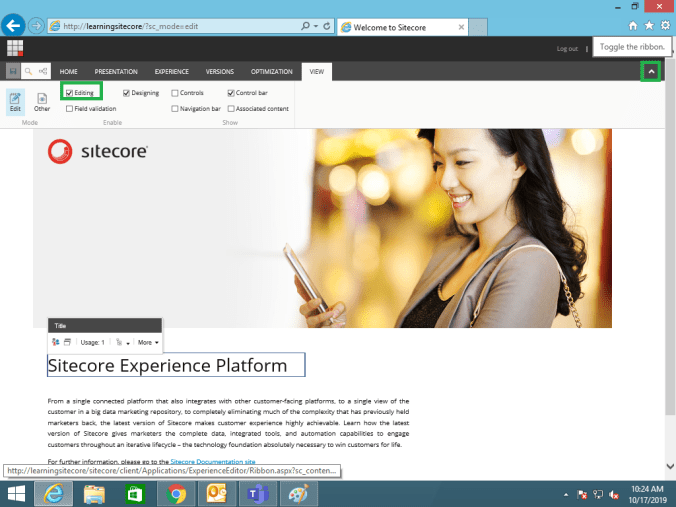
d. In case, if the editing mode is not enabled then we can do it by expanding the drop arrow in the top right corner and clicking on Editing checkbox.
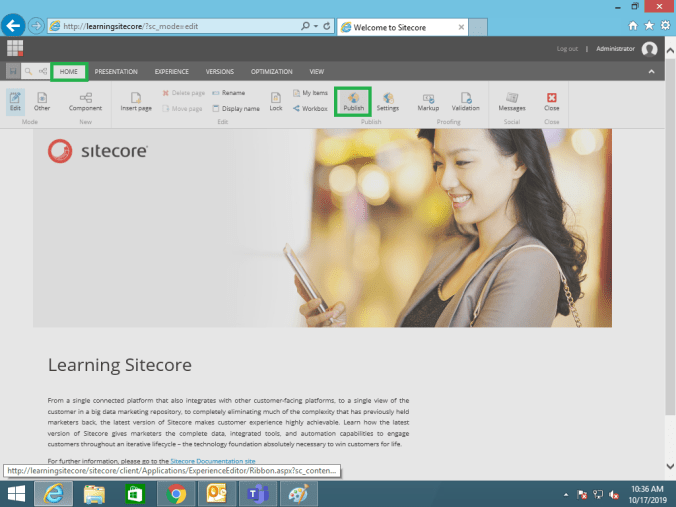
e. Lets change the title from “Sitecore Experience Platform” to “Learning Sitecore” and Save it using the button in Upper Left corner.

f. Lets publish the change so that we can see it on front end site as well.
g. You will get a publish Screen. Without changing any setting, click on Publish.

h. Now there is small twist here. The Publish command will keep moving but the change will not be complete.

i. This is because the instance is trying to locate MongoDB which is used for Marketing purpose. Since we will not be learning that part in the basics, we have not installed it.
j. So lets turn off the setting which is trying to search for this DB.
k. Go to Sitecore instance folder structure – (C:\inetpub\wwwroot\LearningSitecore\Website)
l. Go to App_Config >> Include folder.
m. Search for Sitecore.Xdb.config which should be almost at the end.
n. Open it in Notepad++ and search for Settings (Xdb.Enabled & Xdb.Tracking.Enabled)
o. Change the value of these settings from true to false and Save the file. The Notepad++ should be in Administrator mode to Save this file.

p. Now reload the experience editor and try to publish.
q. Now you can check the front end site. You will be able to see the changes just made.

r. So this is how we do editing using the Experience editor. - Content Editing using Content Editor.
Content Editor is for a bit of technical editors who are aware of different functions inside it and are able to navigate to the items easily. Keep in mind that we as a Developers will be using this interface for our development.
a. Go to Sitecore Dashboard and Login with credentials (admin/b)

b. Click on Content Editor on the launchpad.

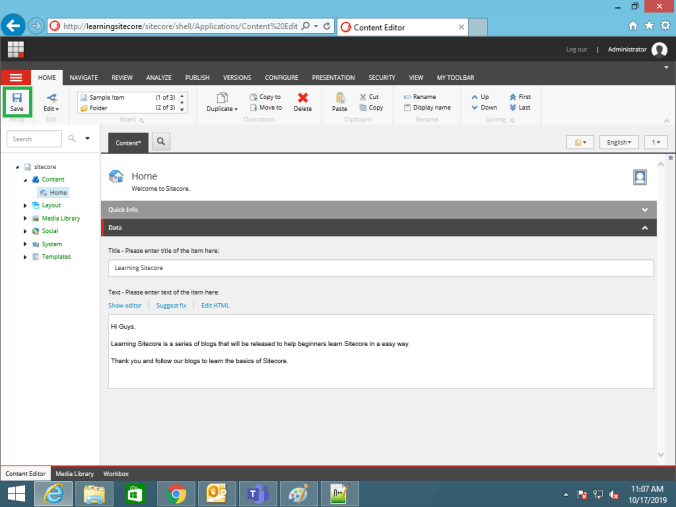
c. After you click on Content Editor, you should be able to see below screen.

d. Lets edit the description of the page. Click on Show Editor link.

e. Enter the text you will like to enter as a description and Accept it. Once you are back to the previous screen, click on Save which is in upper left corner.
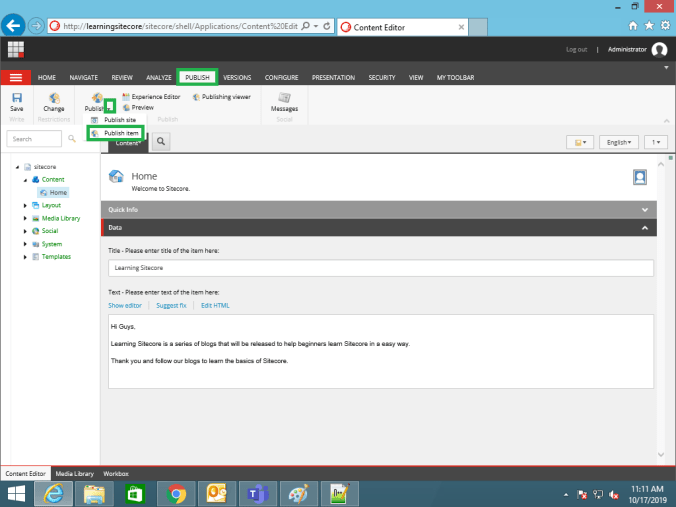
f. Lets publish this change to check if it is reflecting on the front end site. When you click on the drop arrow next to Publish button, you will be able to see 2 options – Publish site and Publish item. Publish site is time consuming operation and that should be used only when your whole site is ready and you have migrated to higher environment. Use Publish item for now.
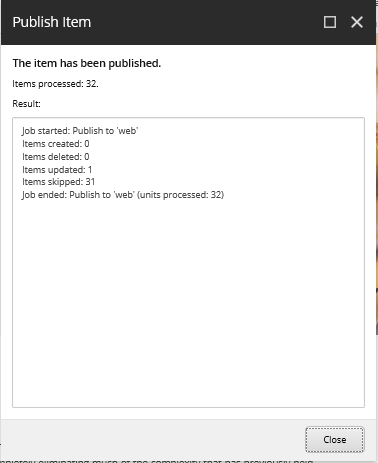
g. You will get the publish screen. Without changing any setting, click on Publish button.
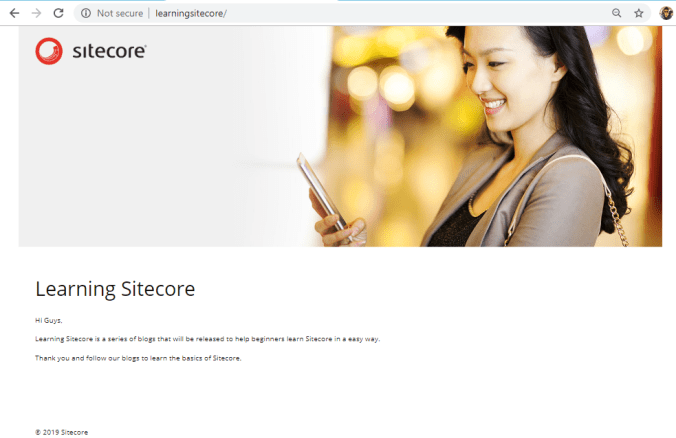
h. Once the publish is complete, reload the front end site and see if the latest changes are getting reflected or not.
 This completes the blog of editing the existing page. So we learnt how we can use both the editing interfaces to edit a page.
In the next blog, we will learn how to integrate a Visual Studio solution with this Sitecore instance. Remember this will be very important as we will be able to create our dummy website based on the VS solution only.
Thank you.. Keep Learning.. Keep Sitecoring.. 🙂

Pingback: Different interfaces and applications in the Launchpad | Sitecore Dairies