Hope the learning series is quite easy to understand. Please reach out to me in case of any queries, will try to solve the queries at the earliest.
In Sitecore CMS, every web page is split into multiple pieces/blocks and each of these blocks is rendered/presented by different components (a piece of functionality) separately. Every component is defined with a specific purpose and functionality.
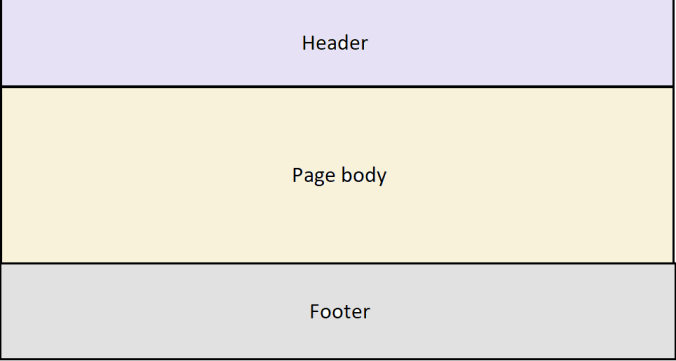
For example a basic web page can have a header, a footer and page body. In this case, we might have a header component, footer component, page body component
Now, each of these components requires some logic to present the right content in each of these sections dynamically. This logic which could generate a piece of html dynamically is nothing but a rendering in Sitecore. Once all the renderings are rendered in page, the complete html of the page is generated and could display the web page as required.
In Sitecore MVC, each rendering is nothing but a controller action or even it could be a simple view.
Before jumping to how to create a rendering, let us discuss how it can be rendered and which the commonly used renderings are. To answer this, we use 2 types of renderings commonly – View Rendering and Controller Rendering.
View Rendering is used when we don’t have much business logic to be executed. Controller rendering is used when we have business logic to be executed.
The renderings can be assigned to a layout statically or dynamically. We can statically bind the components/renderings to the layout when we are sure that its place will not change at any given time ex. Header and Footer. When we are not sure about the placing of the components ex. Main body components then we go for dynamic bindings also known as Placeholders.
So to create a View rendering in Sitecore
- Create a partial view in a Visual Studio.

- Add any HTML which can make you understand that the view rendering is rendered on Front end.

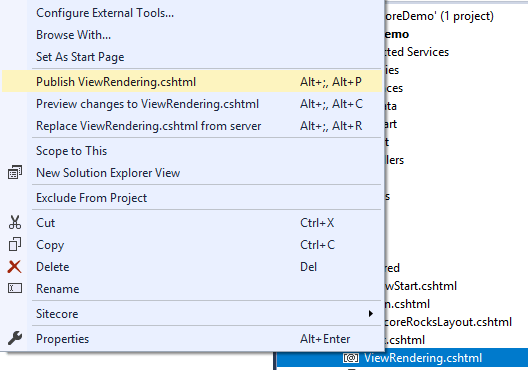
- Publish this View.
- Go to Content Editor and navigate to Renderings (/sitecore/layout/Renderings).
- Right Click >> Insert >> View Rendering.

- Name it View rendering and add the Path of the View which we created (/Views/ViewRendering.cshtml).

- Publish this rendering and note it’s ID.

- Let’s statically bind this View Rendering in the Layout we created earlier.
- Add code ‘@Sitecore().Rendering(“{275115AB-C60F-4FC8-ADC5-A5D5F381BF5D}”)’ in Main.cshtml – the Layout.

- Publish this view and Browse http://learningsitecore/test-item

- This means our View rendering is rendered successfully on the Layout. So we learnt about creating a View rendering and statically binding it to the layout. Now let’s learn about Controller rendering and dynamically binding it to the layout.
To create a Controller rendering in Sitecore
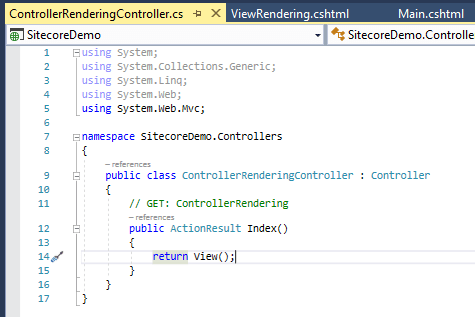
- Let’ create a Controller in Visual Studio and write one Action method.
- If you remember we have one Fruits folder in Sitecore, so we will create a Controller rendering to display all the fruits on the page.
- Click on Controller Folder and Click on Add >> Controller.
- MVC 5 Controller – Empty.
- Name it “ControllerRendering”.

- The body of the Controller looks something like this.
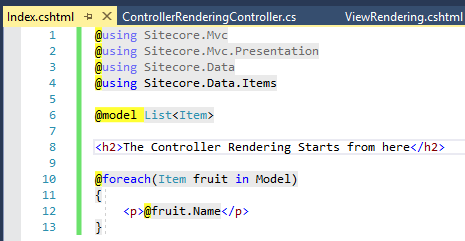
- Now let’s add the Sitecore namespaces and code to fetch the Fruits folder in the business logic.

- Now we need to create a View for this controller.
- Hover over the method and right Click >> Add View.

- Let the name be Index and it be partial View. Click Add.

- The body of the View should be to read the list of Fruit and display them.
- Now let’s publish the whole solution as the code behind in involved. Right Click on Solution >> Publish.

- Once the publish task is completed. Reload the Sitecore and go to the Content Editor.
- Navigate to the Renderings ((/sitecore/layout/Renderings).
- Right Click >> Insert >> Controller rendering.

- Let the name be Controller rendering.
- Enter the value for Controller and Action Fields.

- Publish the Rendering.
- Let’s dynamically bind this rendering to the Main Layout.
- Add this code ‘@Sitecore().Placeholder(“main”)’ in Main Layout.

- Publish the Main.cshtml
- Go to the Test Item in Sitecore (/sitecore/content/Home/Test Item)
- Click on Presentation tab >> Details.

- Click on Edit link the pop up.

- Click on the Controls tab in the left.

- Click on Add button in the right.
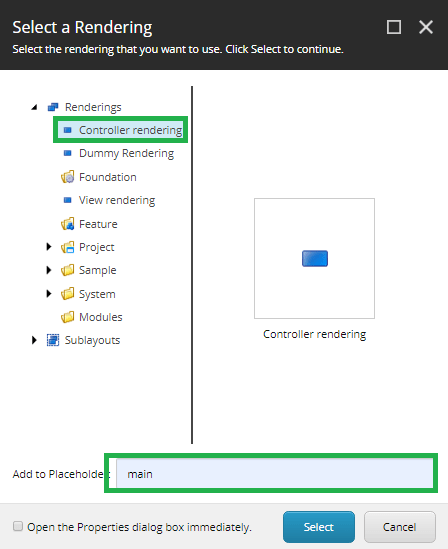
- Select the ‘Controller rendering’ which we created and in Add to Placeholder textbox, write ‘main’ as we have set ‘main’ as key in our Main layout – ‘@Sitecore().Placeholder(“main”)’
- Click Select >> Click OK >> Click OK.
- Save the Changes and Publish the Test Item.
- Now Browse http://learningsitecore/test-item

So we learnt about View Rendering and Controller rendering and how to assign them to Layout based on statically and dynamically bindings. For statically binding we need the ID of the Rendering we create and For dynamically binding we use the placeholder keys.
In the next blog, we will learn about the placeholders and placeholder settings.
Thank you.. Keep Learning.. Keep Sitecoring.. 🙂

Pingback: Creating a Layout – Part I | Sitecore Dairies